 ( 030 ) 13-Jan-2015
In this picture I have laid out the kerfing on the heating blanket.
( 030 ) 13-Jan-2015
In this picture I have laid out the kerfing on the heating blanket.
 ( 031 ) 13-Jan-2015
The kerfing needs to be bent into the same shape as the sides. The kerfing provides a sufficient gluing surface so we can glue the thin top to the thin sides.
 ( 032 ) 13-Jan-2015
I use a reverse kerfing similar to a gunwale on a boat that will make the sides very strong and stiff.
 ( 033 ) 13-Jan-2015
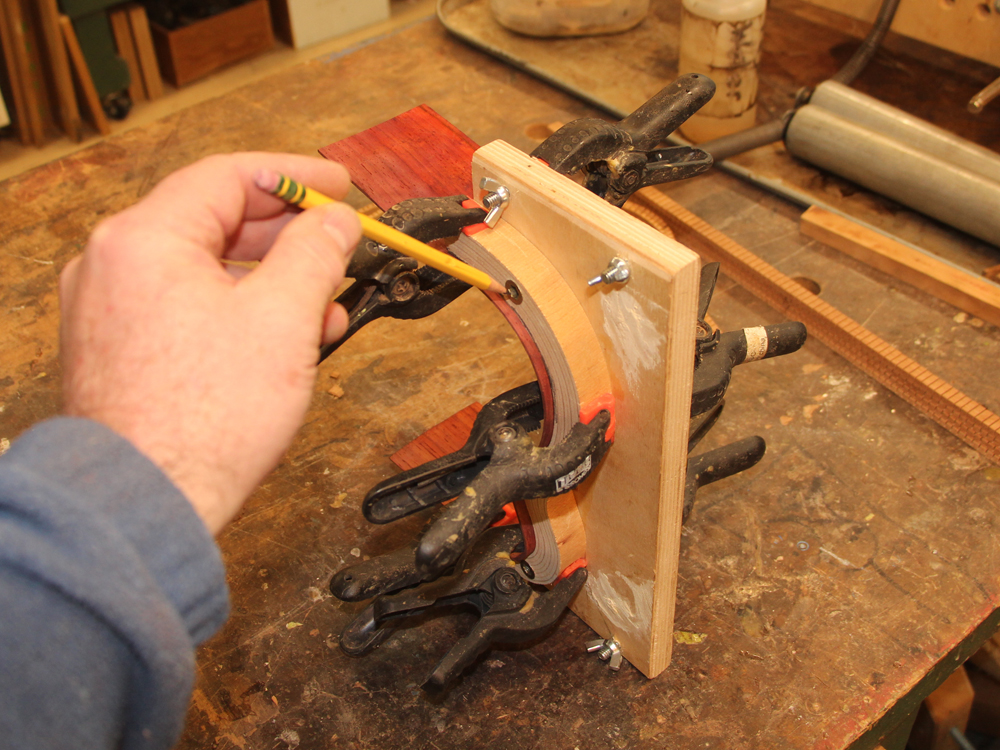
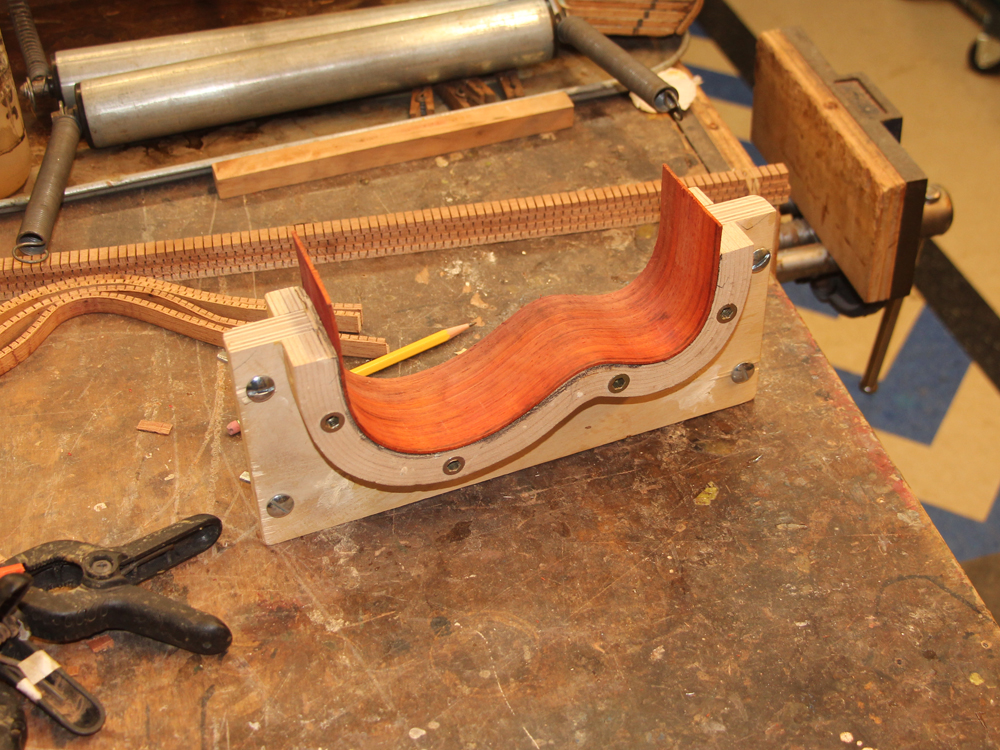
When I bent the sides I started with a side blank bigger than the finished guitar. Here I am marking out the shape of the side, using the side form as a template.
 ( 034 ) 13-Jan-2015
I use this raised platen band saw to trim the sides to shape.
 ( 035 ) 13-Jan-2015
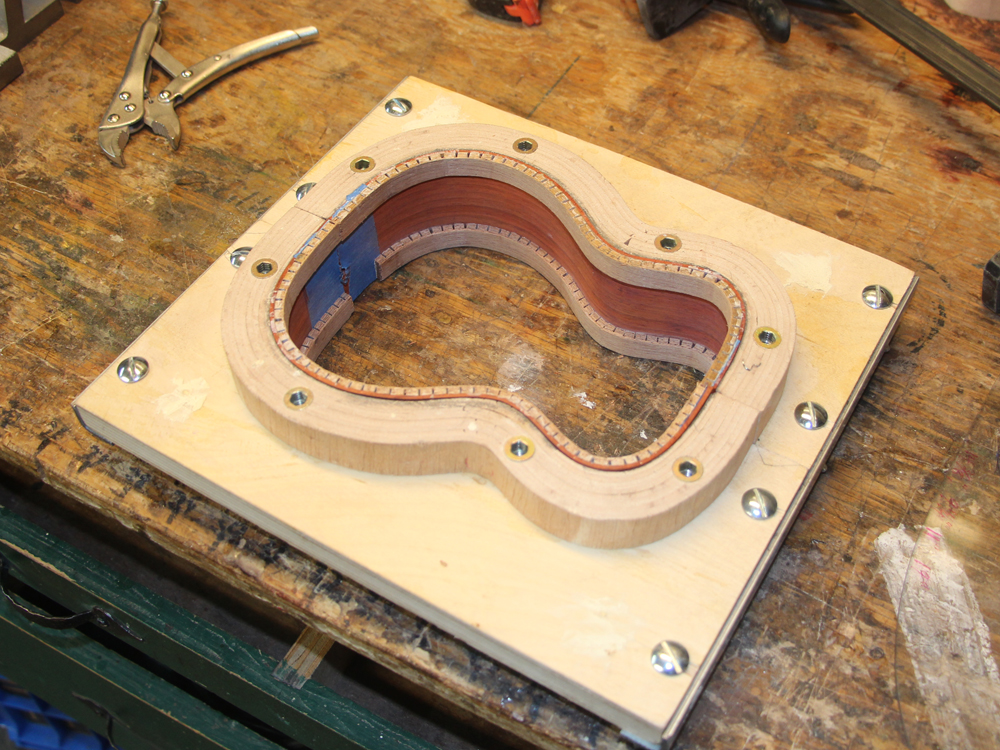
Checking for proper fit.
 ( 036 ) 13-Jan-2015
Now I apply a layer of glue to the kerfing and I clamp the kerfing onto the interior of the sides while the sides are in the form. I spent considerable time making sure the form has the shape I want, so when the kerfing is glued on, the sides get pressed into the form... that has the right shape... got that?
 ( 037 ) 13-Jan-2015
The second edge gets a piece of kerfing... did I tell you I have lots of clamps.
 ( 038 ) 13-Jan-2015
Now I clean up the glue squeeze out with water and a brush.
 ( 039 ) 13-Jan-2015
And then I blow out any remaining goo.
 ( 040 ) 13-Jan-2015
The side blanks with the kerfing glued in.
 ( 041 ) 13-Jan-2015
I spend a bit of time cleaning up... I want everything in this guitar to be beautiful, whether it will be seen or not.
 ( 042 ) 13-Jan-2015
With the side clamped in the form I trim off the ends.
 ( 043 ) 13-Jan-2015
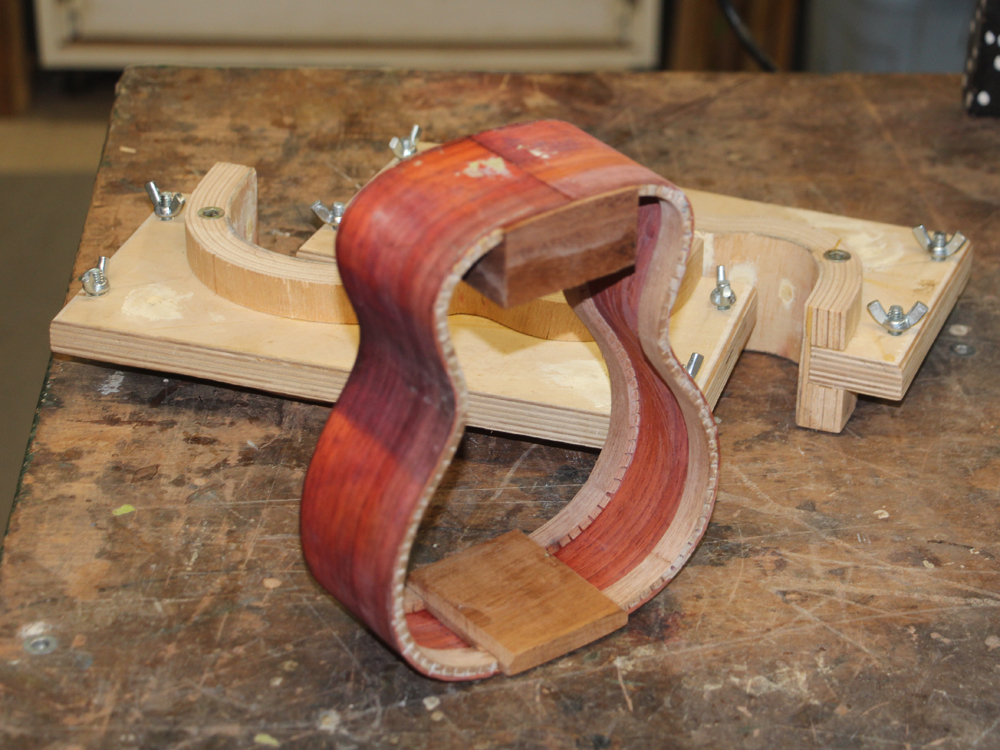
And now I can join the two sides.
 ( 044 ) 13-Jan-2015
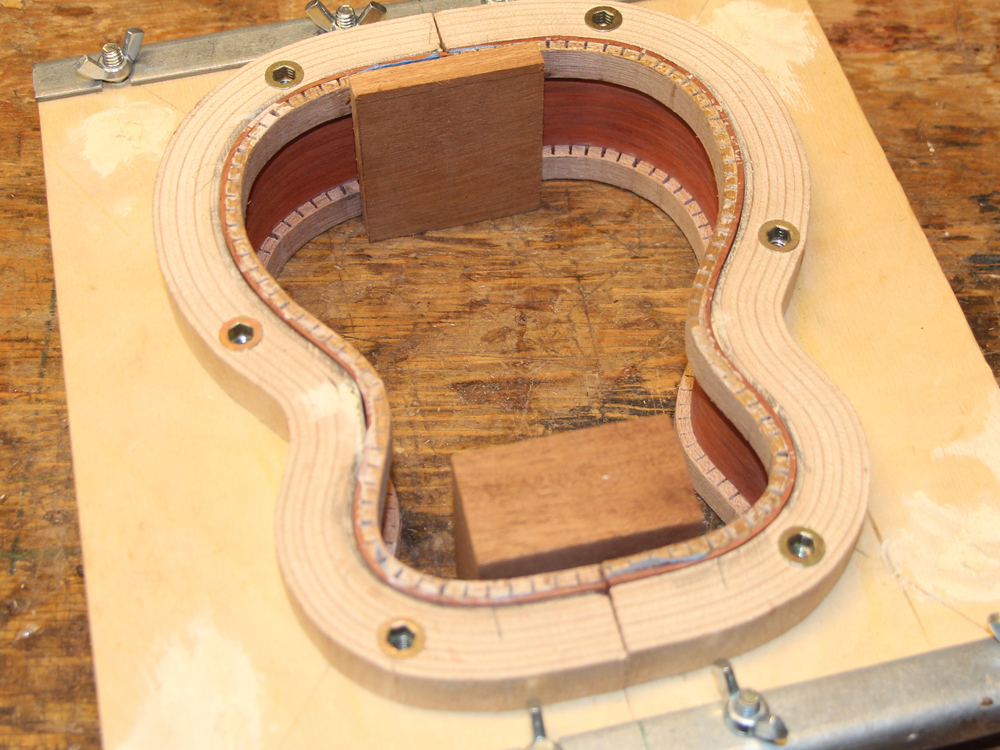
The two halves will be held together with a heel block and a tail block.
 ( 045 ) 13-Jan-2015
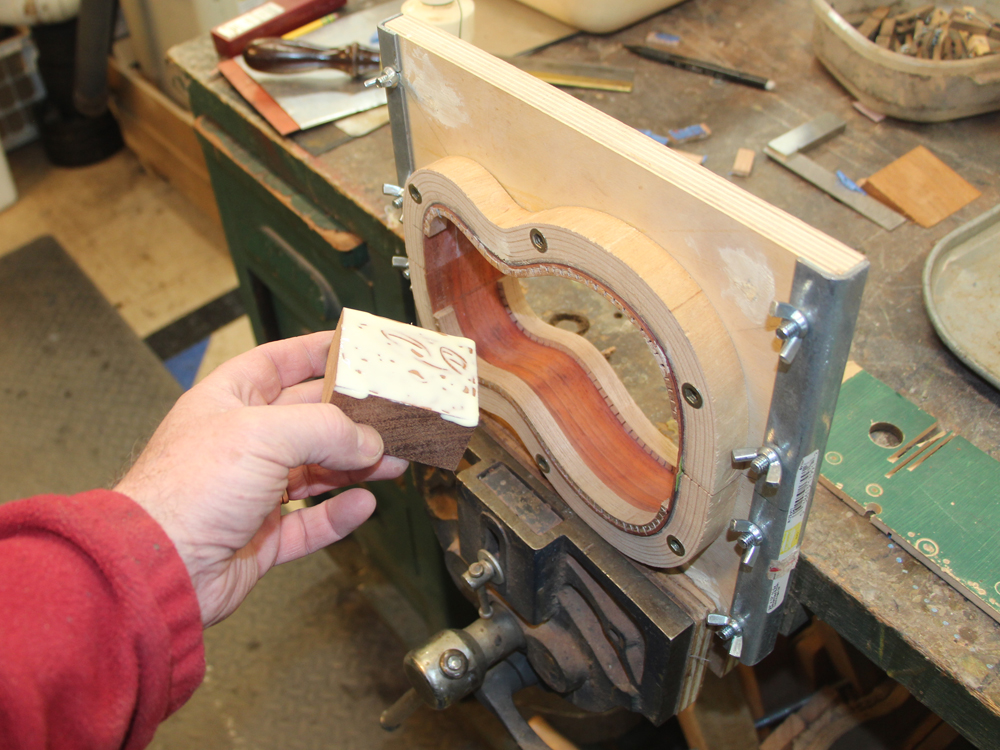
Here I am marking the position of the heel bock on the sides.
 ( 046 ) 13-Jan-2015
I use a small saw to cut away the kerfing where the heel block will go. The blue tape kept the kerfing from sticking to the sides.
 ( 047 ) 13-Jan-2015
The heel block drops right in.
 ( 048 ) 13-Jan-2015
The front of the guitar has a curve to it that the heel block must match to make a good gluing surface. Here I am using a carpenter's trick to trace the shape of the sides onto the bottom of the heel block.
 ( 049 ) 13-Jan-2015
Then I use the disk sander to shape the heel block.
 ( 050 ) 13-Jan-2015
Perfect fit.
 ( 051 ) 13-Jan-2015
The tail block gets the same treatment.
 ( 052 ) 13-Jan-2015
And then I bevel the edges so they look nice.
 ( 053 ) 13-Jan-2015
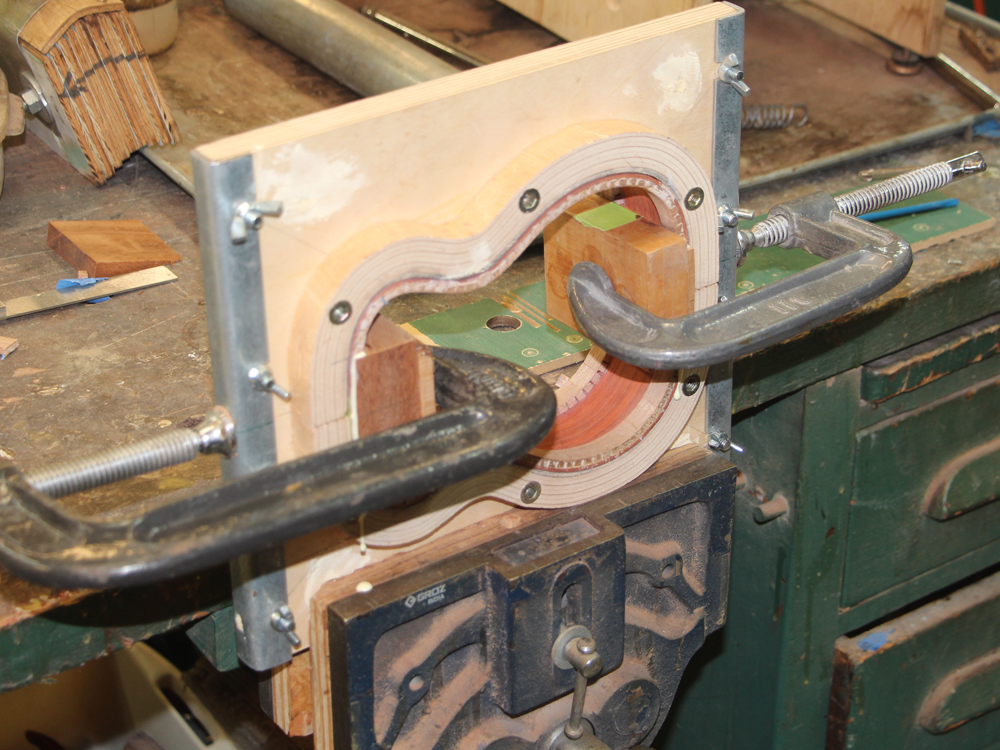
A bit of glue,
 ( 054 ) 13-Jan-2015
and the tie blocks get glued in place.
 ( 055 ) 13-Jan-2015
When the glue has set up I break the rim out of the form.
 ( 056 ) 13-Jan-2015
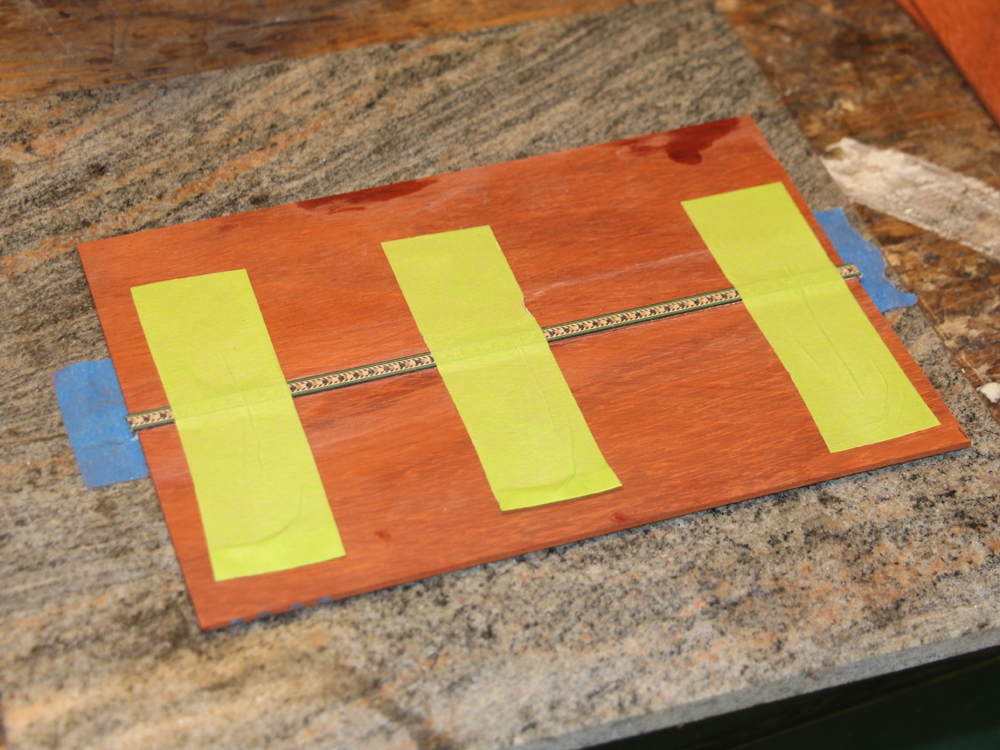
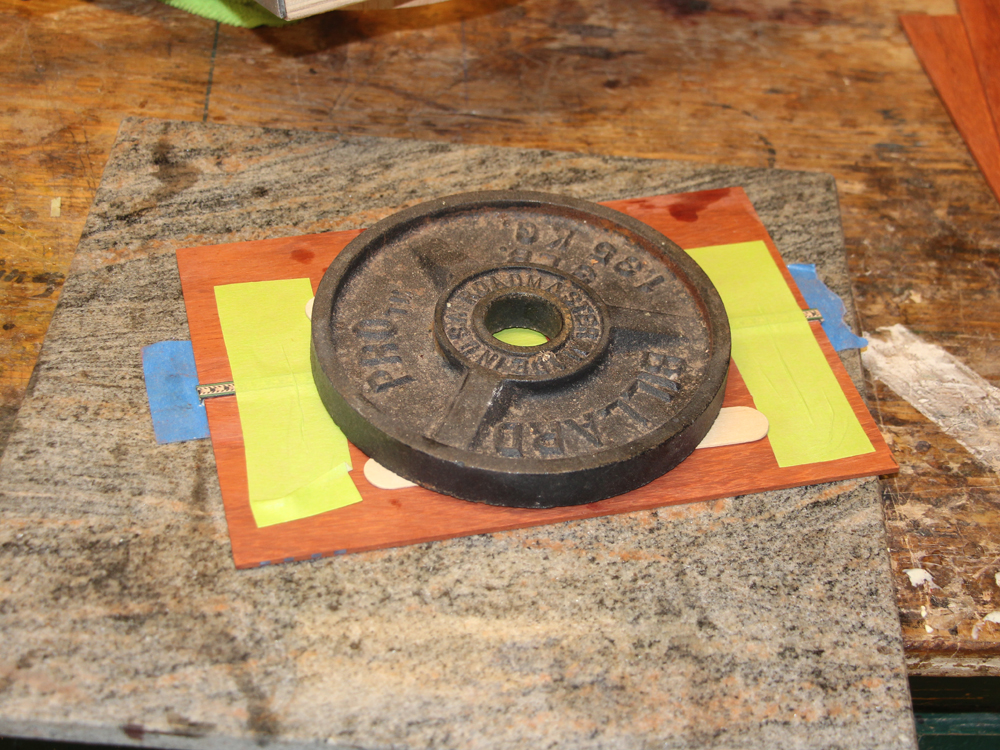
Now to prepare the back plate, I am gluing the two book matched halves together with a center strip in between.
 ( 057 ) 13-Jan-2015
A bit of calibrated weight hold everything flat.
 ( 058 ) 13-Jan-2015
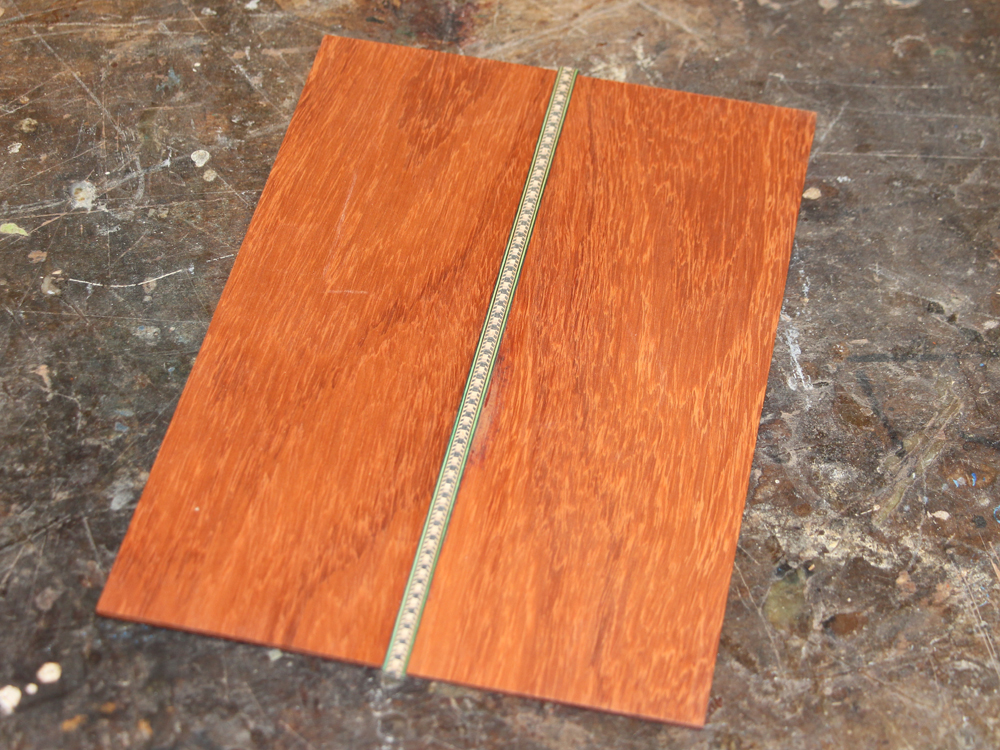
The back plate.
 ( 059 ) 13-Jan-2015
And the center strip.
 ( 060 ) 13-Jan-2015
Ready for braces.